This comprehensive guide will provide step-by-step instructions for creating a new post on Adorack, tailored specifically for various social media platforms. Whether you’re looking to share your content on Facebook, X, or Instagram, this guide has got you covered.
You will learn how to craft the perfect post, choose the right image, add hashtags, and optimize your content for each platform.
Post Content
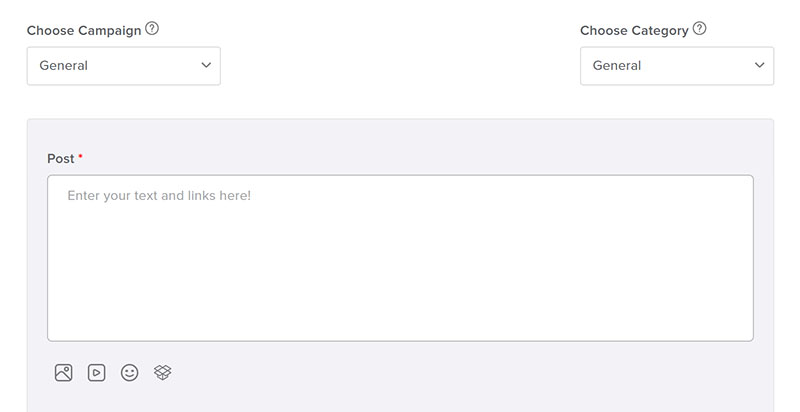
Here you can create engaging posts by entering your desired content in the provided text area. You can select the campaign, category, and accounts you want the post to be associated with.
Additionally, you can upload media, such as images and videos, to make the post more visually appealing. To further enhance engagement, you can include emojis and hashtags that are relevant to your content. You also have the option to add attachments from Dropbox.
To know more about posting and adding media to your content, check “Posting Contents and Adding Media”.
Add Variations
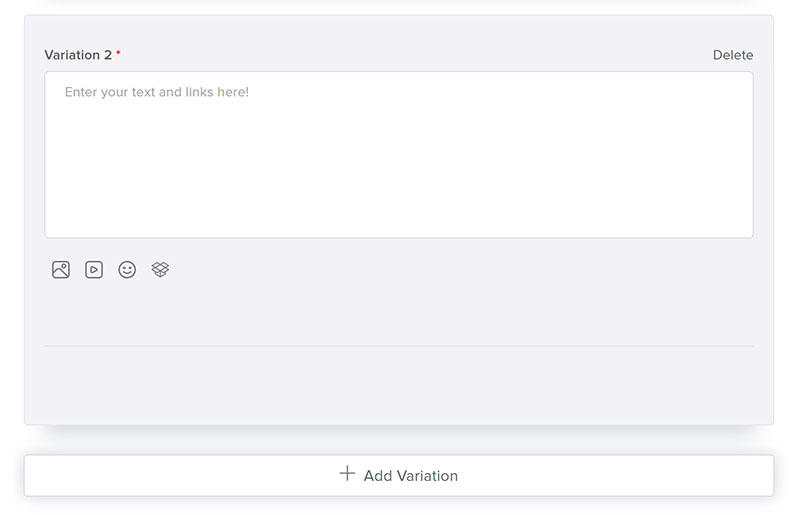
By using the “Add Variations” feature, you can create numerous versions of a single post. This allows you to have more options in your content library. There is no limit on creating the no of variations.
To add more variations:
- Navigate to the “Create New Post” page.
- Enter the post area with the content and add media to it.
- Click the “Add Variation” button at the bottom of the post area.
- You can attach a different media file to each variation and make a distinct difference among the variations.
While adding variations, only the first variation will get posted immediately, and the remaining variations will be added to the auto-schedule and posted when their turn comes.
Having a variety of content ensures that your audience stays engaged and interested in your brand. So, don’t hesitate to add variations to your posts and make the most of your content.
Check out the Post Order to learn about the order in which the post and its variations get posted.
Advanced Options
There are a few advanced options for you to post your content.
- With the “Use Once” option, you’ll only be able to publish the post once to the account. Also, if you add variations to a post and select the use once option, those variations will publish only once. This feature helps when you want a post to be posted only once and not repeated multiple times.
- If you want any of your posts to not publish after a specific date and time, you have the expire option for that. Select the date and time after which you don’t want that post to be published; this will stop the posts and their variations from being posted after that time.
When to post?
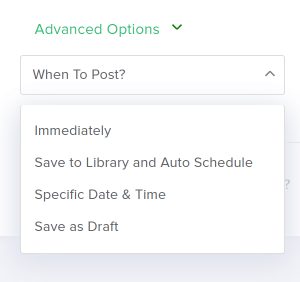
Post Immediately
Choose “Immediately” if you wish to post your content right away. But when you add variations to the post, only the first variation will be posted and the remaining variations will get auto-scheduled. You have to create a timeslot in the calendar for those variations. Check “Create Timeslot” to know how to create one. The variations will post according to the post order and start to recur.
Auto-Schedule your post
You have the option to save your post in the library and schedule it. Schedule your post for a particular campaign and category. If there is already a timeslot created under that campaign and category, then the posts that you auto-schedule go straight to the queue and are published according to the post order. But if no timeslot is created, you have to create a timeslot for that.
Auto-scheduled posts will be posted based on the time slots in which they are saved. Check out Post Order to learn more about the order in which auto-scheduled posts get posted.
Specific Date and Time
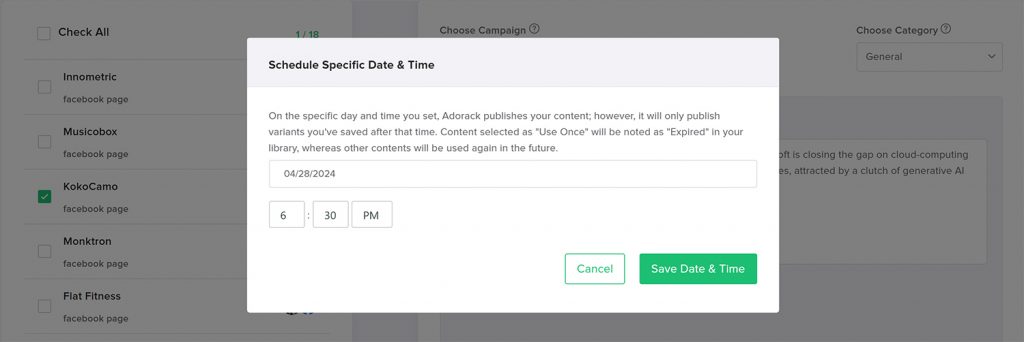
Scheduling the posts on “Specific Date and Time”, users can designate a precise date and time for their posts to be posted on social media platforms.
Adorack publishes the content at the specified date and time. If users have multiple variants of the post, such as different captions or images, the first variant will be scheduled for the chosen date and time, while the remaining variants will be saved to the library and automatically scheduled for the timeslot of the selected campaign and category.
If the “Use Once” advanced option is used then the post will be marked as “Expired” in the library after posted, ensuring they are not reused in the future. This option allows for greater flexibility in managing content and ensures that users maintain a fresh and engaging social media presence.
Save as Draft
When users select this option, their post is saved to the drafts section, where it can be easily accessed for editing and scheduling at a later time. Once a post is saved as a draft, users have the freedom to make any necessary adjustments, such as refining the copy, selecting different social media, or updating the scheduling details.
Furthermore, posts saved as drafts remain securely stored within the tool until they are ready to be scheduled for publication. Check out the Drafts section to learn more about what content goes into the Drafts page.
Need more collaboration
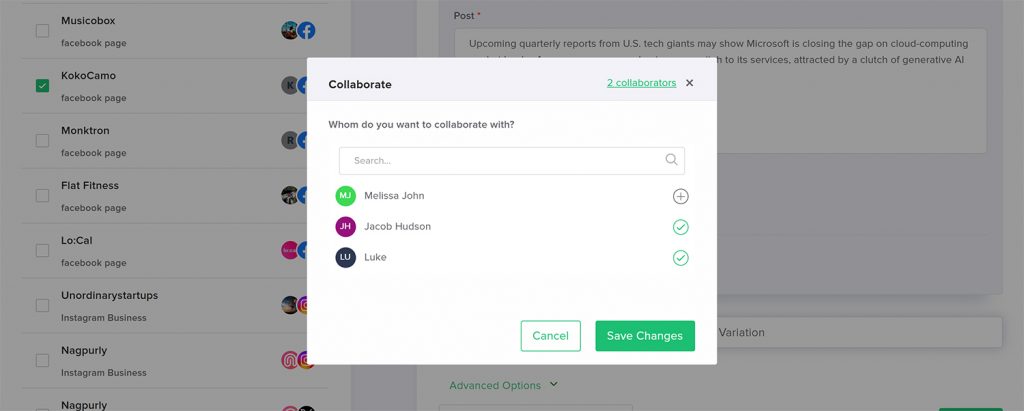
This is to add more collaboration to a post which means adding any other member of your workspace in that post. In this case, the post will go to that member for approval and once that member has approved it will be posted.
- When you are assigned in the “Any Member” approval method, any one member including the collaborated member is enough for approval.
- In the case of the “All members need to approve” method, all the members including the collaborated members have to approve for posting.
To initiate collaboration on a post,
- Simply navigate to the “Add New Post” page.
- Click the plus button located at the bottom, next to the “Need to collaborate with another member”.
- Adorack displays the list of all members within the workspace. From there, select the desired team member by clicking the plus icon next to their name to invite them to collaborate on the post.
Once invited, the selected team member gains access to review and approve the post directly. It’s important to note that this collaboration feature is optional and can be selectively applied to specific posts based on user preference.
Limitation Guidelines
Character Limits
Here are the character limits for each social media network:
- X: 280 characters
- Instagram: 2200 characters
- Pinterest: 500 characters
- Youtube: 5000 characters
- LinkedIn: 1300 characters
- Facebook: No character limit
Image Size and Limit
Adorack supports image content only for Facebook, Pinterest, X, LinkedIn and Instagram.
- jpeg/jpg/png/gif only
- 8MB file size
- Pinterest: 1 image (personal account) and 5 images (business account)
- X: up to 4 images
- LinkedIn: up to 9 images
- Instagram: up to 10 images
- Facebook: up to 20 images
Video Size and Limit
Only one video can be allowed per variation on every network except Instagram. Instagram allows you to upload up to 10 images or videos as a post.
Videos and images can be attached together to post, except on Instagram.
- Supports MP4 and MOV file extensions
- 512 MB file size
- Maximum dimensions of 3840*2160
- No maximum length
- Supports MP4 and MOV file extensions
- 100 MB file size
- in-feed video length: 3 seconds to 60 minutes
- Reels video length: 15 seconds to 90 seconds
- Story video length: 1 second to 60 seconds
Pinterest allows video pins only in the business account.
- Supports MP4 and MOV file extensions
- 2GB file size
- Maximum length is 15 minutes
- Supports MP4 file extension
- 200MB file size
- Maximum dimension of 4096*4096
- Maximum 15 minutes length
X
- Supports MP4 and MOV file extensions
- 512MB file size
- Dimensions must be between 32×32 and 1280×1024
- Maximum length is 140 seconds
Youtube
- Supports MP4 and MOV file extensions
- 256GB file size
- Maximum video length of 12 hours
