Workspace
Workspace
A workspace is a vital component of any successful team effort, as it provides a shared environment in which to collaborate and achieve a common goal.
In Adorack, the workspace serves as a highly effective tool for managing tasks, scheduling work, making postings, and tracking progress. By centralizing all of these crucial elements within one workspace, Adorack ensures that your team can work more efficiently and effectively, enabling you to easily achieve your goals.
Members in your workspace
When you create a workspace, you can invite members to join it. This will allow you to invite the people you want to work with within that workspace.
The owner of the workspace will automatically become the admin and will be responsible for leading the team as well as assigning roles to team members.
Types of members in your workspace
- Member + Admin
- Members
- Limited Access Members
What a member with admin rights can do:
- Create their own workspace.
- Rename the workspace.
- Manage and delete the workspace.
- Invite and remove members, and assign roles to them.
- Assign the approval method to any member or limited access member.
- Create, edit, view, and delete posts, campaigns, categories, and timeslots.
- Manage queue and library.
- Add, manage, and delete social media accounts.
What a member can access in your workspace:
- Create their own workspace.
- Invite people to the workspace and assign roles to them.
- Assign approval method.
- Create, edit, view, and delete posts, campaigns, categories, timeslots.
- Manage queue and library.
- Add, manage, and delete social media accounts.
What a limited access member can do in your workspace:
- Create their own workspace.
- Create, edit, and delete posts until approval.
- Only view campaigns, queue, calendar, timeslots, accounts, and categories.
- Posts only the approved content.
- Cannot invite or remove people from the workspace.
Create a New Workspace
With just one Adorack account, you have the power to create or join multiple workspaces and collaborate simultaneously.
To create a new workspace:
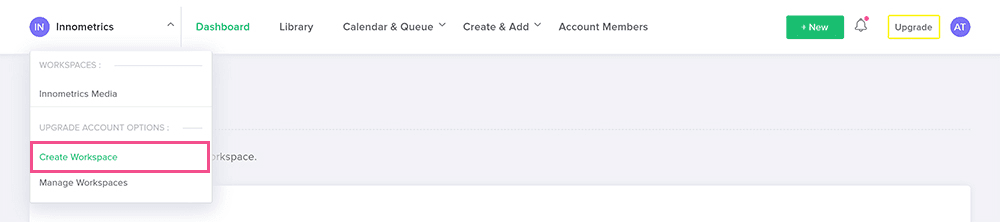
- Click the leftmost workspace tab in the menu bar and click the "Create Workspace".
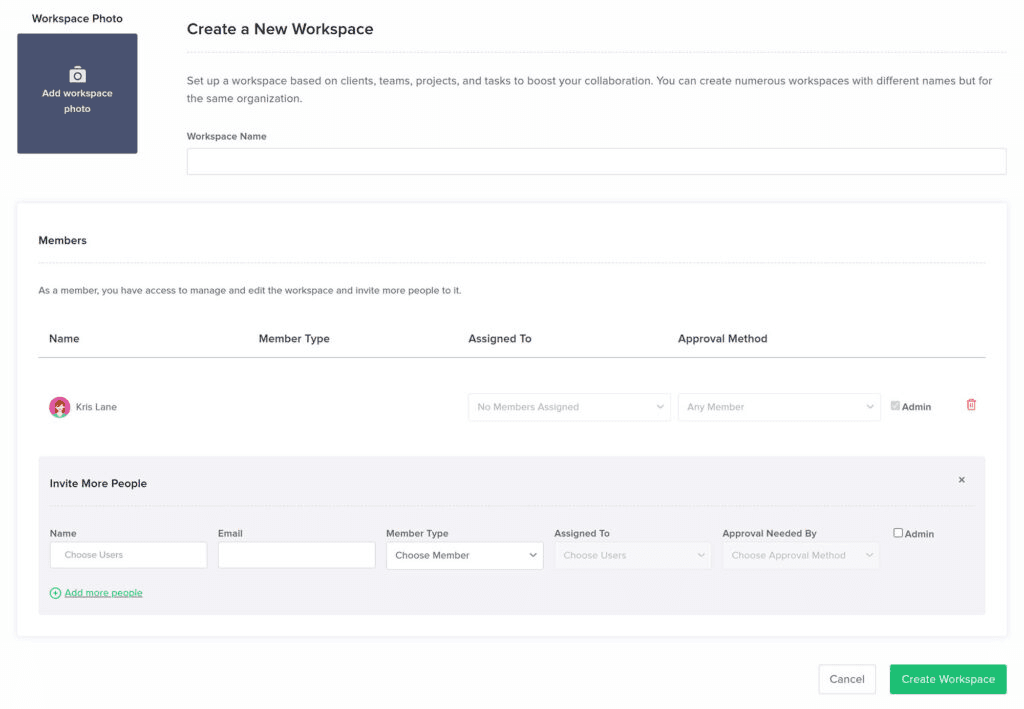
- Set your workspace's profile photo and a workspace name to it.
- Invite members to the workspace.
- Choose to select the member type.
- Assign the selected member to other users.
- Give approval rights to any one or all the members as you wish.
Manage workspaces
Inviting more users, removing members or limited access members, deleting a workspace, and changing the approval system are the actions performed under the "Manage a Workspace" section.
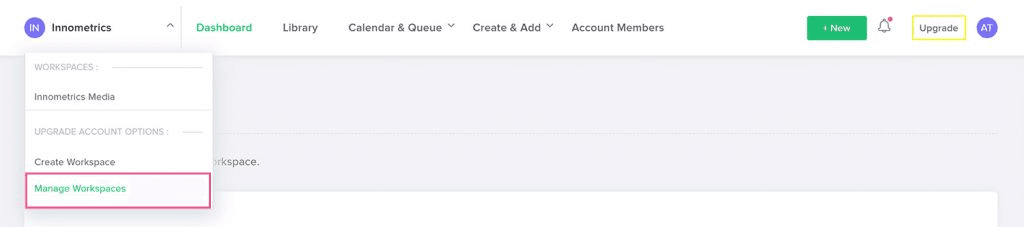
Click the leftmost workspace tab in the menubar and click on "Manage Workspace".
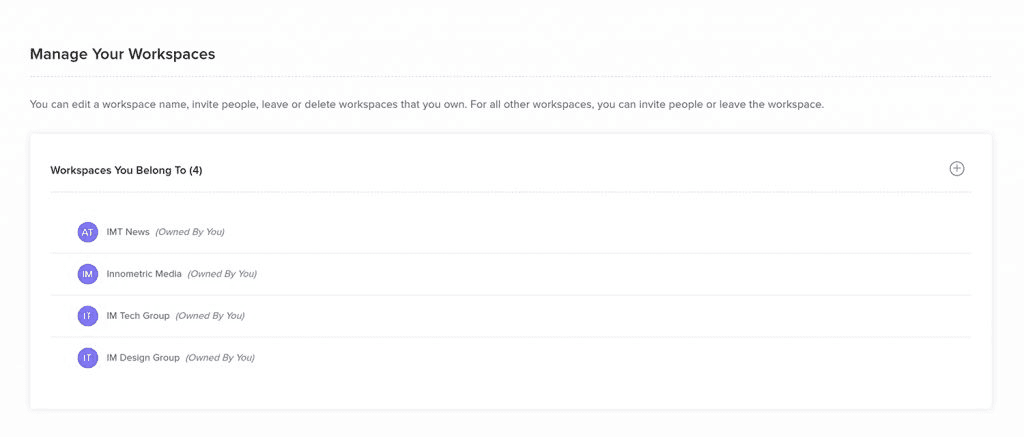
Edit your Workspace
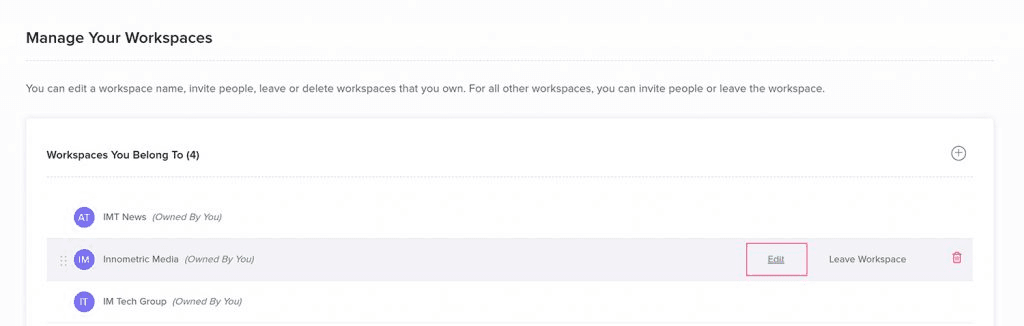
- Choose the workspace you want to edit and click "Edit".
- Edit the workspace name and profile photo, remove users, change the role, and manage your complete entity.
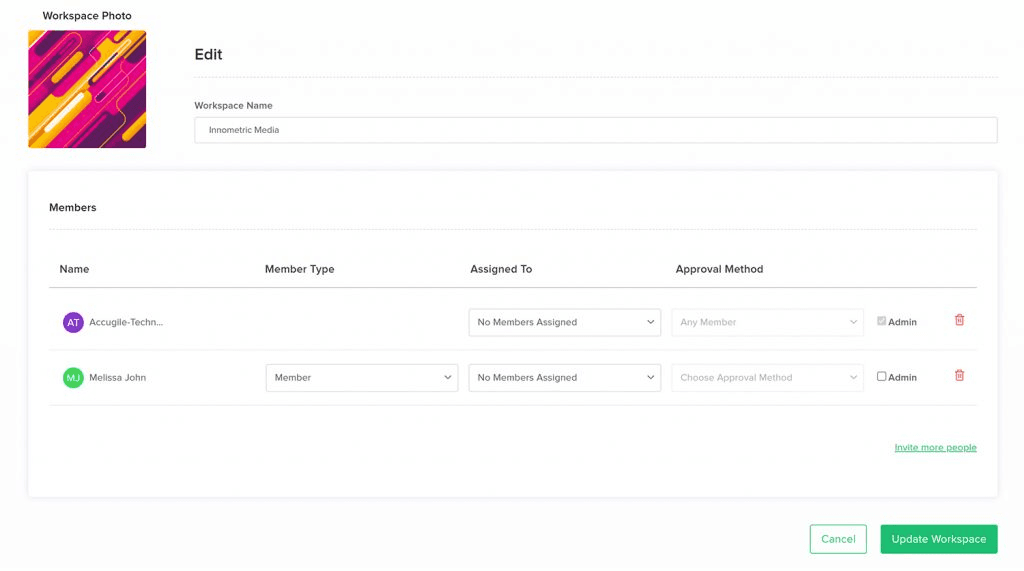
Invite Members to the Workspace
To become a member of an already existing workspace, you need an invitation from a current member. Reach out to a current member to request an invitation. Users from different workspaces can also be invited to the other workspace.
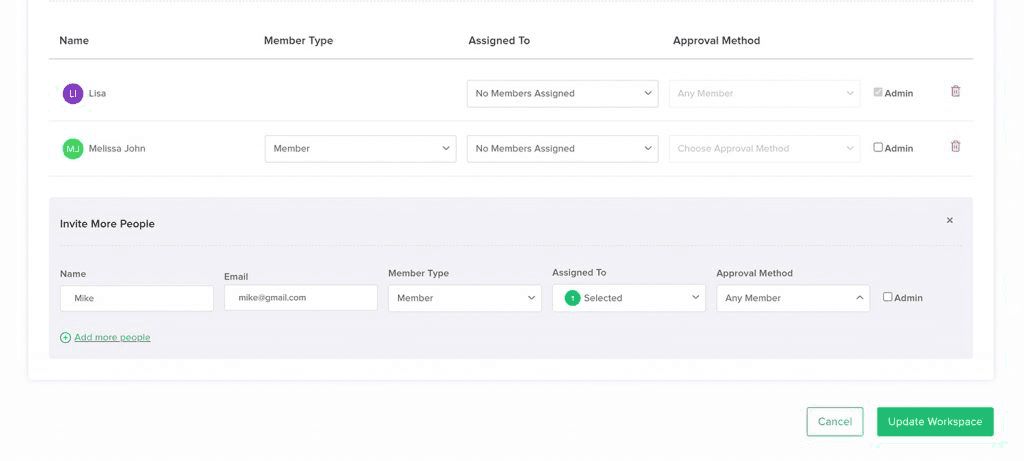
To invite more people:
- Navigate to the "Manage Workspace" page and click the "Edit" icon on the workspace you want to invite more people to.
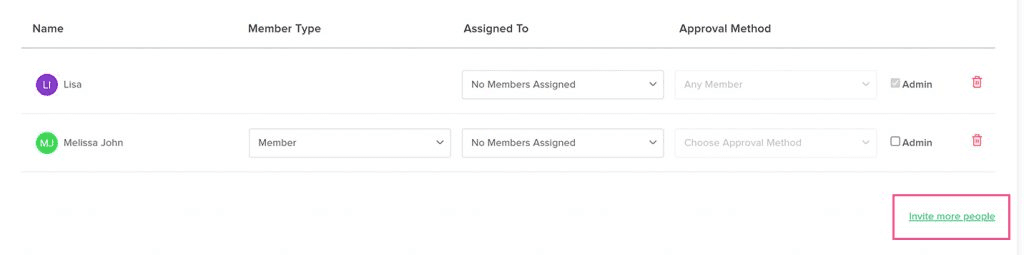
- Click the "Invite more people" button at the bottom right corner.
- Choose the user from the dropdown, which displays the users of other workspaces, or add a new user whom you wish to invite.
- Use the "Resend Invite" button to remind the user about the invitation at a later time.
Remove members and limited access members
Remove members or limited access members if you want to revoke their access to your workspace's projects and tasks.
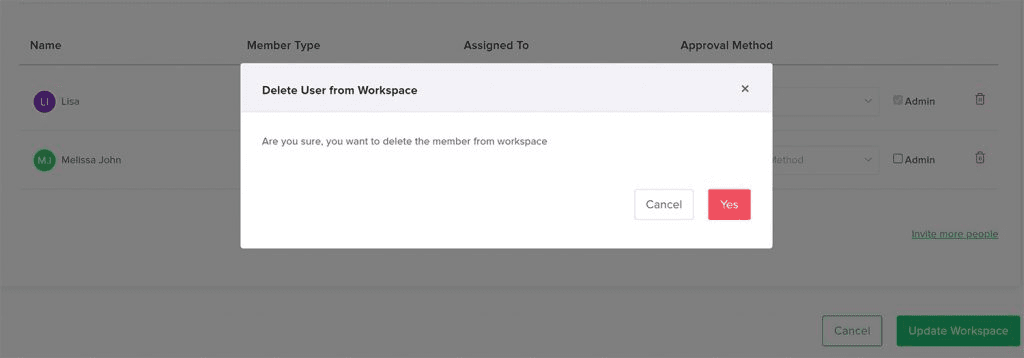
- Choose the workspace and click on "Edit".
- Choose the user who needs to be removed and click the "Bin" icon.
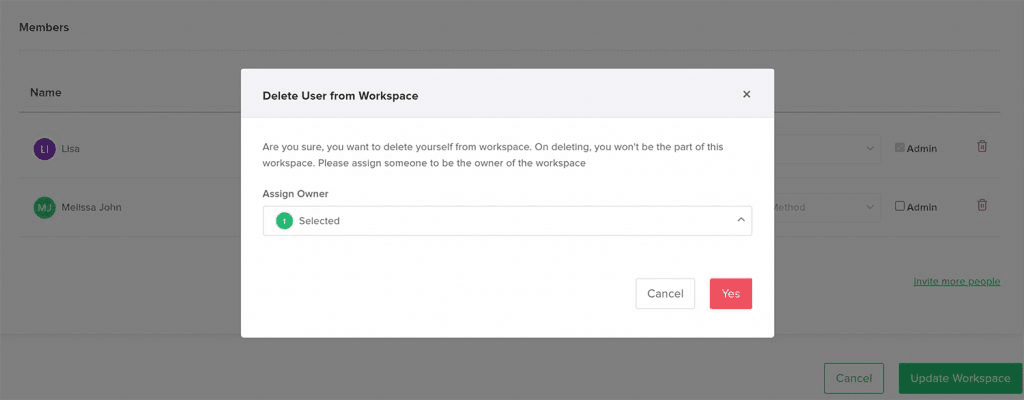
Members who have admin rights can delete their own user account, but before deleting, they must assign any other member as the workspace owner.
Delete the workspace
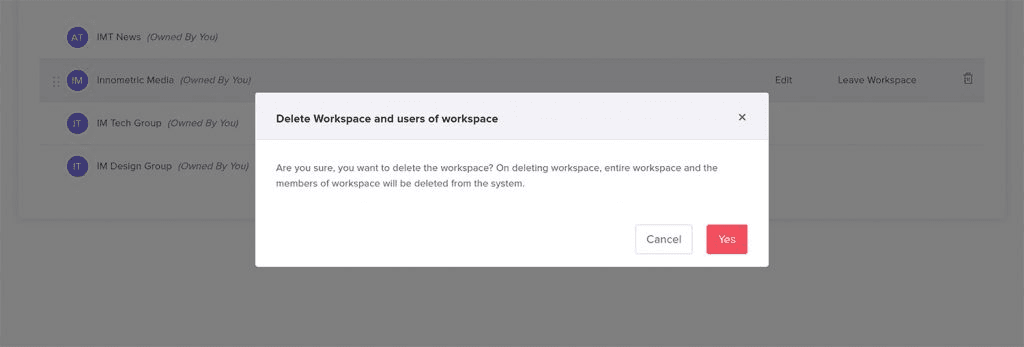
Only the workspace owner has the right to delete the workspace. Deleting the workspace will completely erase all the posts, members, and anything related to that workspace.
To delete the workspace:
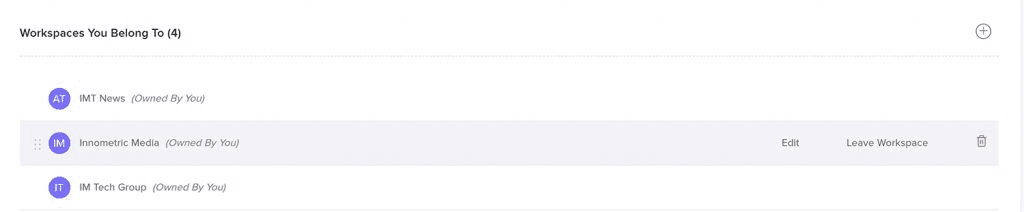
- Click on "Manage Workspace".
- Choose the workspace and click "Bin" icon at the right corner to delete.
Leave the workspace
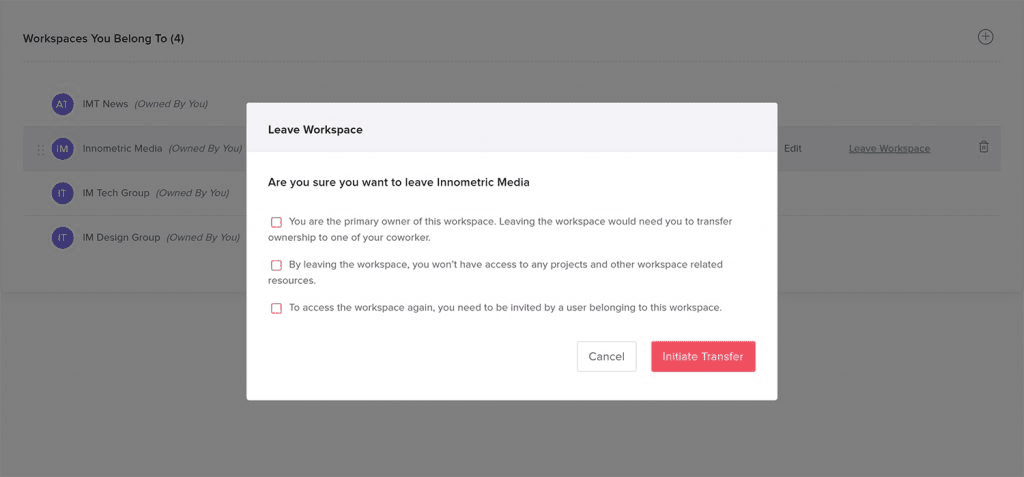
Once you leave the workspace, your whole profile will be removed from that workspace, and it will not appear in your dashboard.
To leave the workspace:
- Click "Manage Workspace".
- Choose the workspace and click the "Leave Workspace" at the right corner to delete.
- Transfer the admin rights to any other member if you are leaving your own workspace.
If you are the only member of a workspace, in that case, it is not possible to leave the workspace.